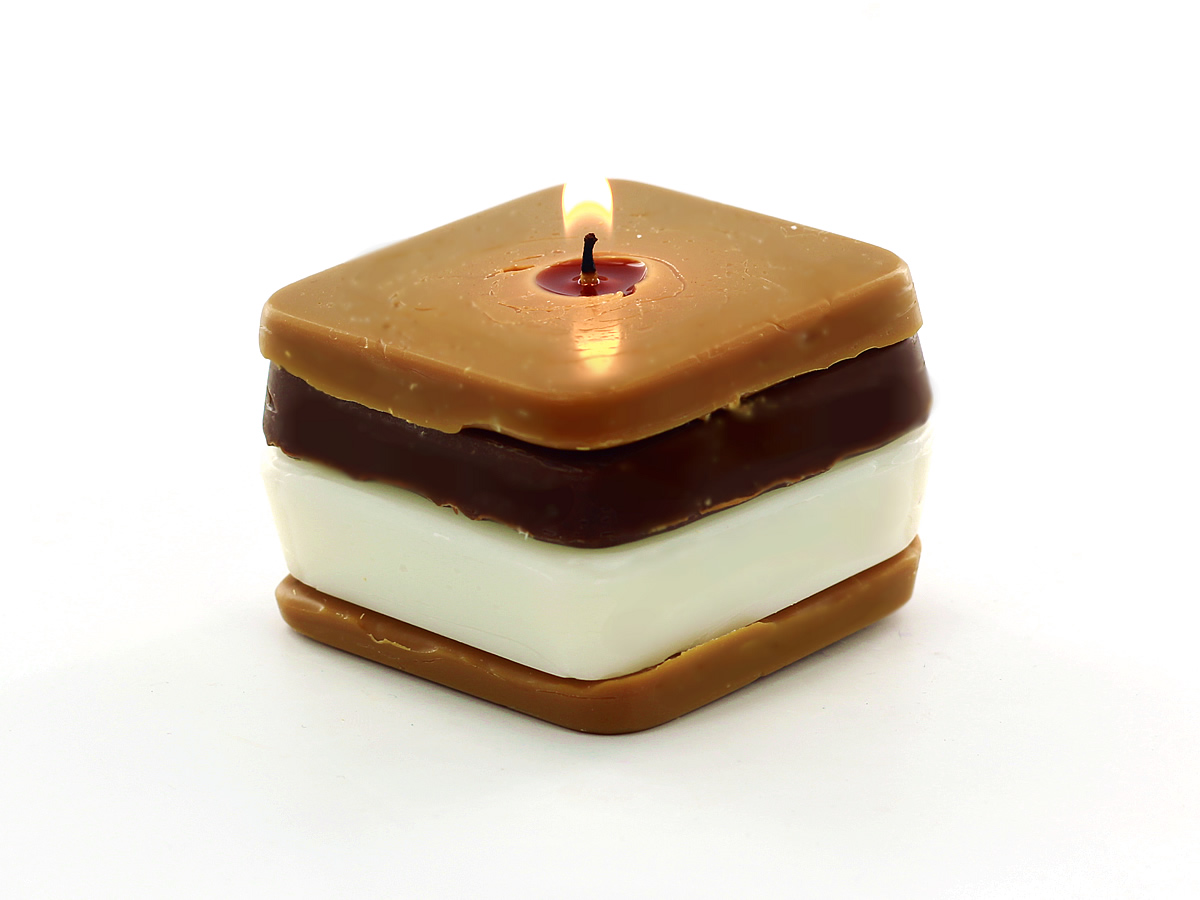
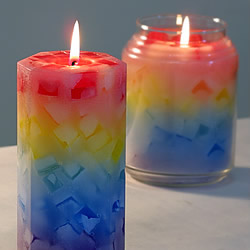
Bring the yummy camping treat right into your home by making your own S’mores Candles!
You Will Need:
–Square Soap Mold
–Votive Wax (or lower melt point pillar wax)
–Golden Honey Liquid Dye or Maple Dye Chips
–Brown or Coffee Liquid Dye or Brown Dye Chips
–Pouring Pitcher
–Wick Pin or Skewer
–Pre-tabbed Wicks (We used C-60)
–Fragrance Oil (optional)
–Scale (recommended)
–Thermometer (recommended)
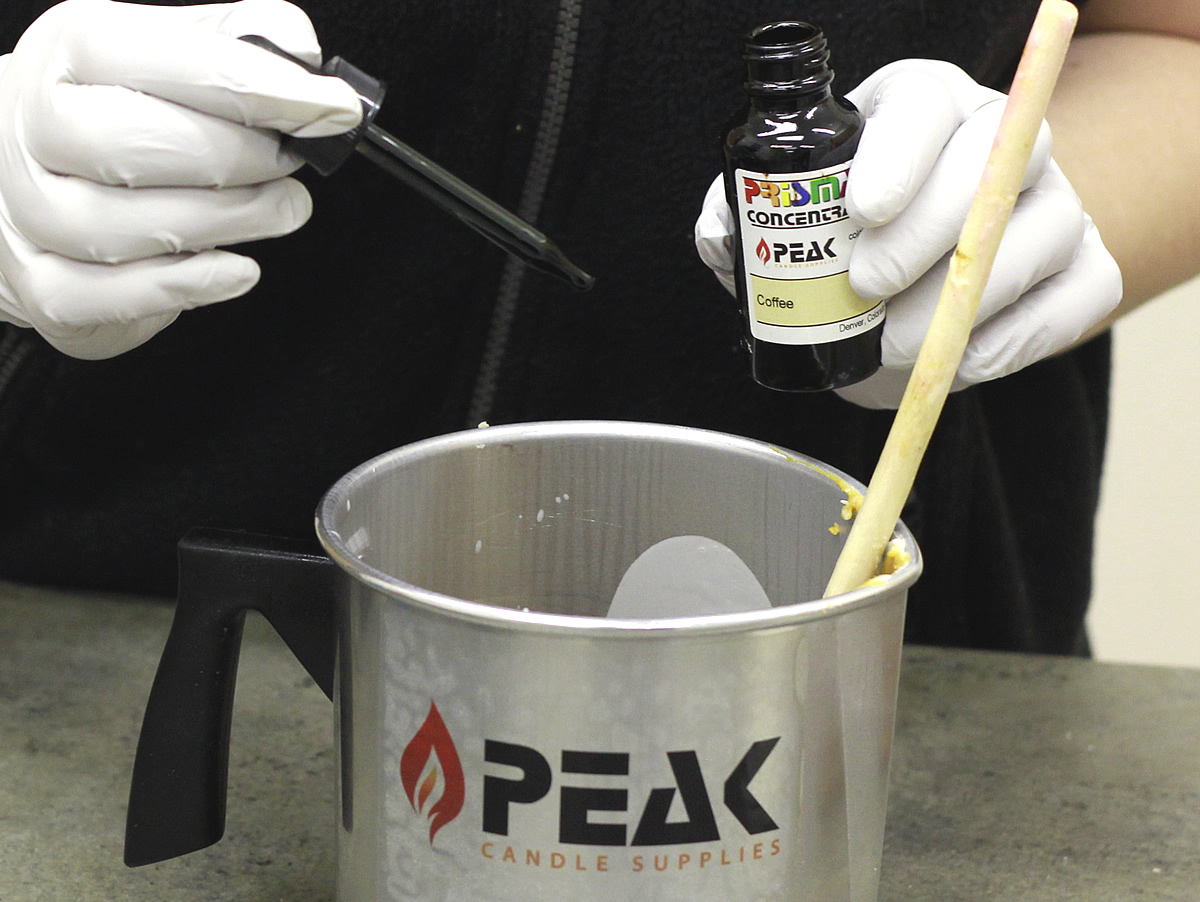
Step 1:
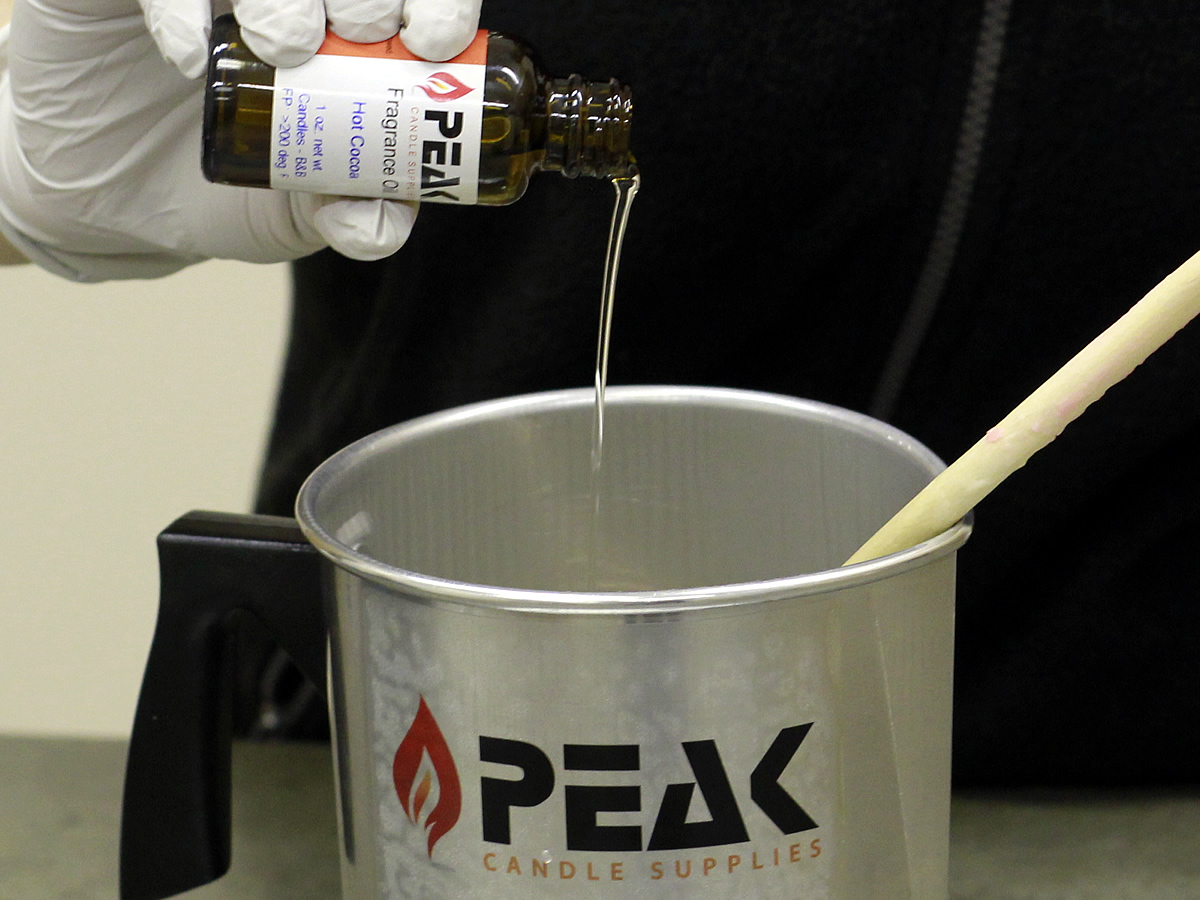
Melt your wax in your pouring pitcher using the double boiler method. IGI 4794 Votive Blend works great for this project due to its low melt point. You can also try other harder/pillar waxes such as Ecosoya Pillar Blend Soy Wax if you prefer. Once melted, add your fragrance oil if desired and mix thoroughly. Tip: We did not add color to this step but you can add a small amount of Golden Honey or Ivory Dye Chip if you want a more “toasted” marshmallow look.
Step 2:
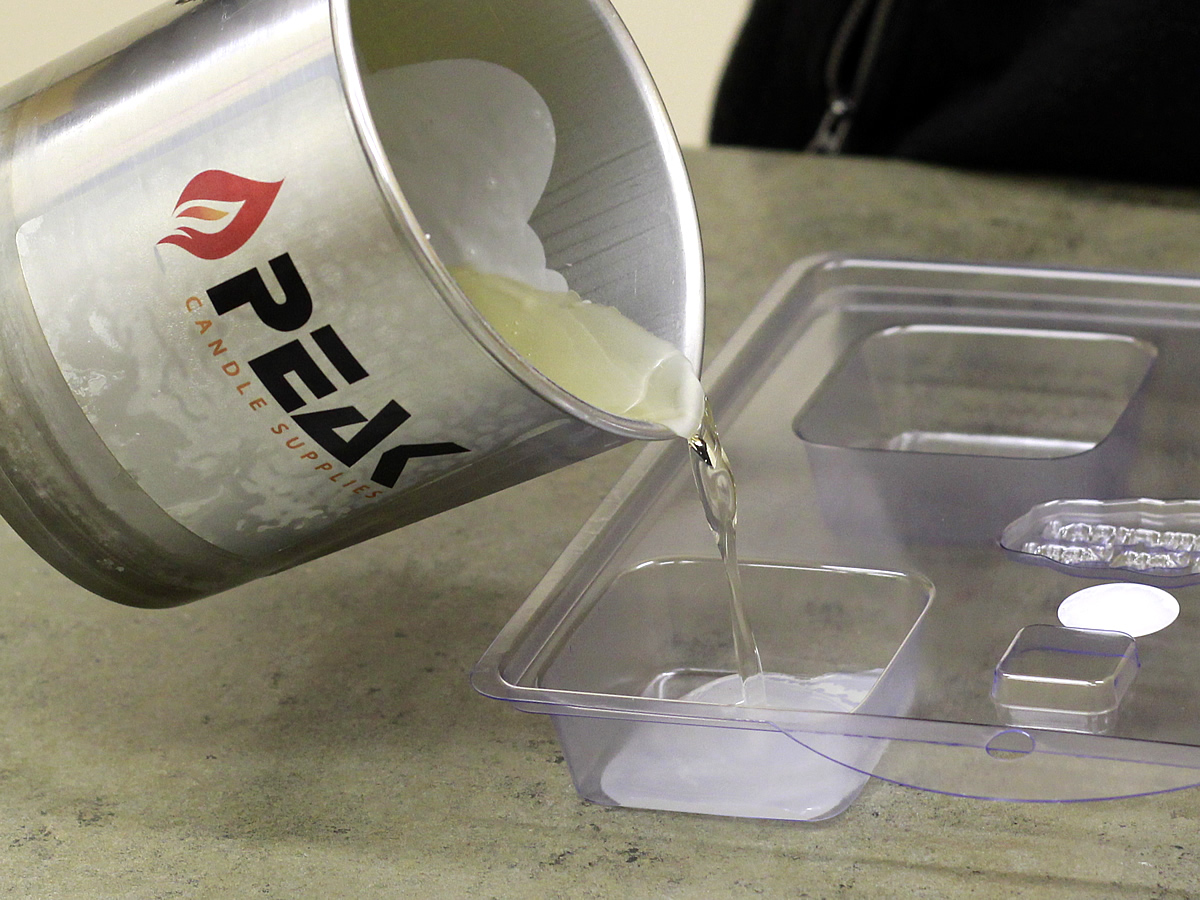
Pour the wax into the Square Soap Mold cavity to the thickness you would like your marshmallow to be. We filled ours about halfway. Allow to cool.
Step 3:
Re-melt the wax if necessary and add the Golden Honey or Maple Dye for the “graham crackers” and mix thoroughly. Pour a thin layer (about ¼”) of wax into two of the Square Soap Mold cavities and allow to cool.
Step 4:
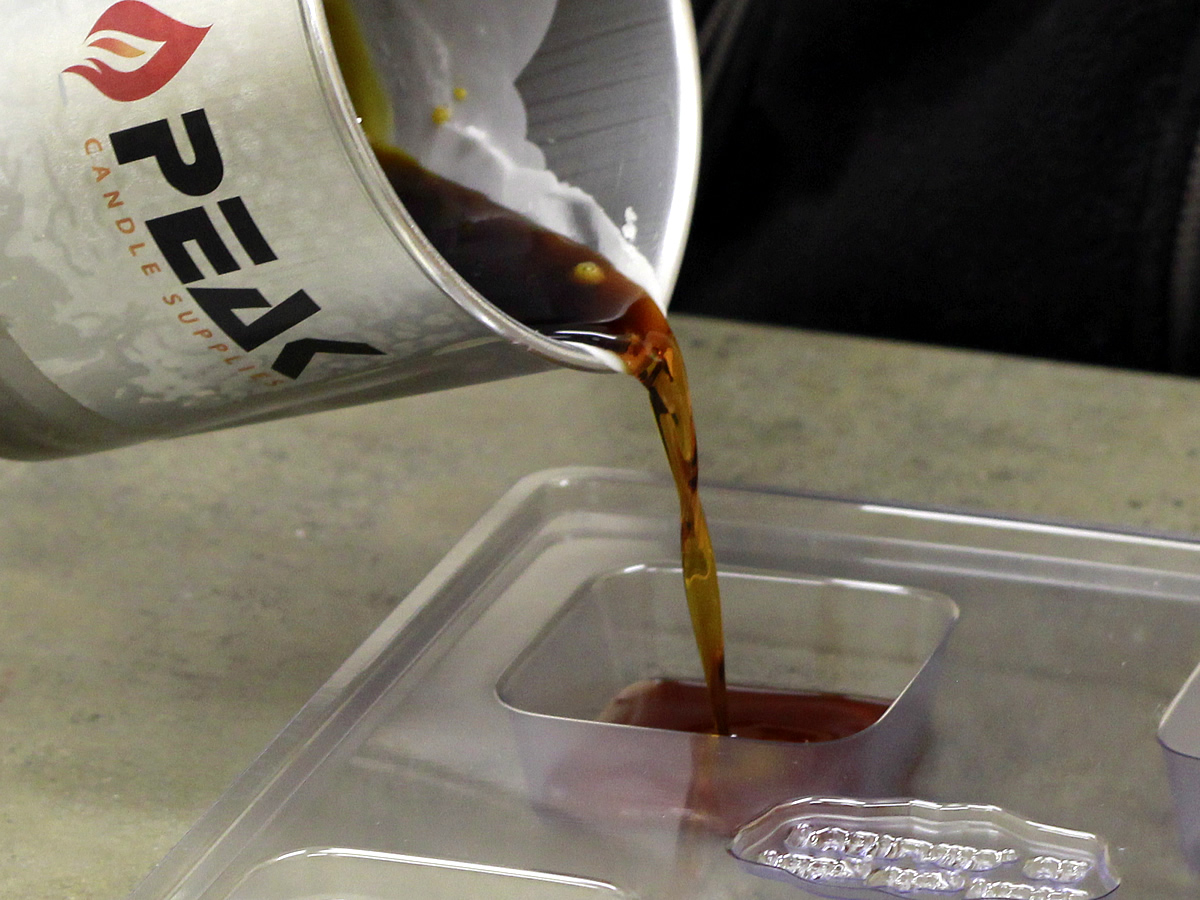
Re-melt the wax one more time and add the Brown or Coffee Dye for the “chocolate” piece and mix thoroughly. Pour the brown wax into the final cavity, about the same thickness as the “graham cracker” pieces and allow to cool.
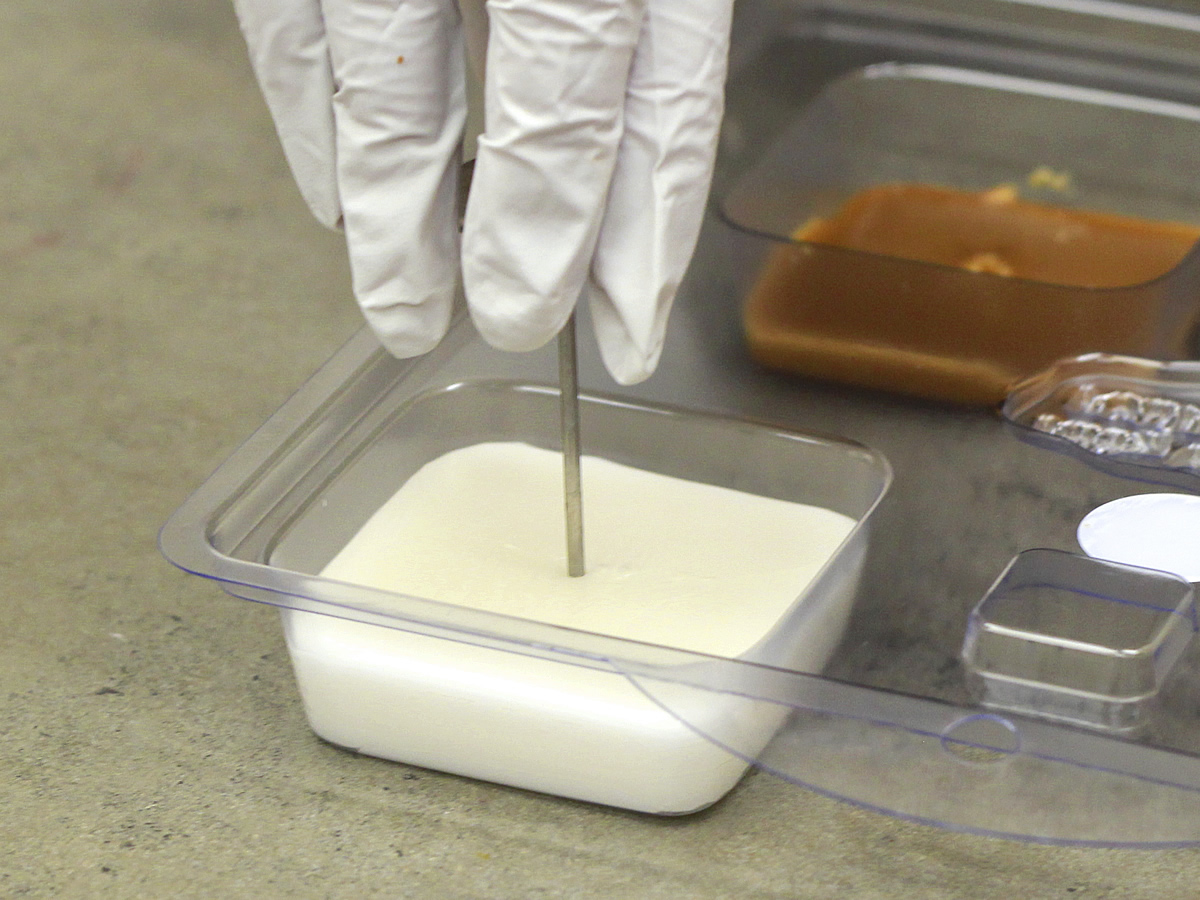
Step 5:
When the waxes have partially cooled to the consistency of cookie dough, use your wick pin or skewer to poke a hole for the wick in the center of each piece of wax. Allow to finish cooling completely.
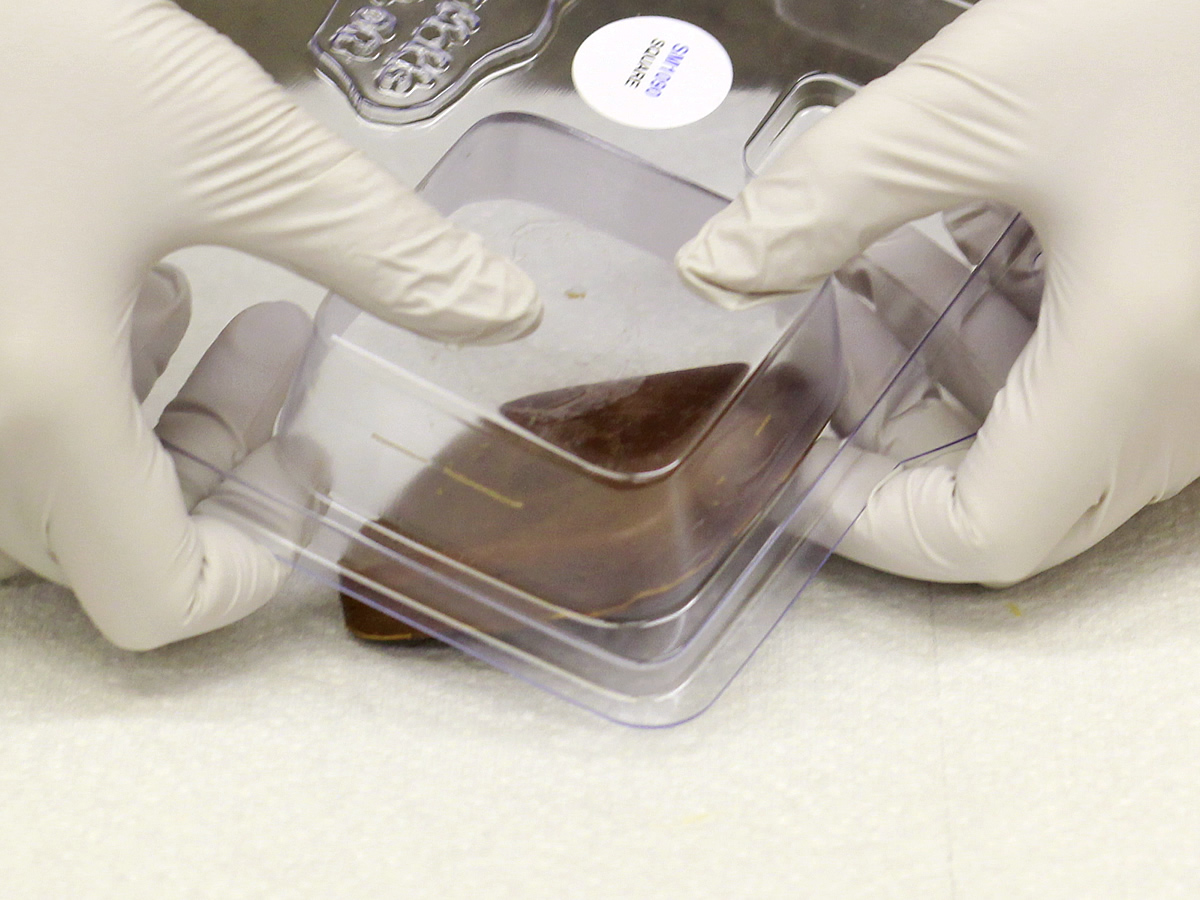
Step 6:
When the wax has cooled completely, remove each piece from the mold by gently pushing on the mold with your thumbs.
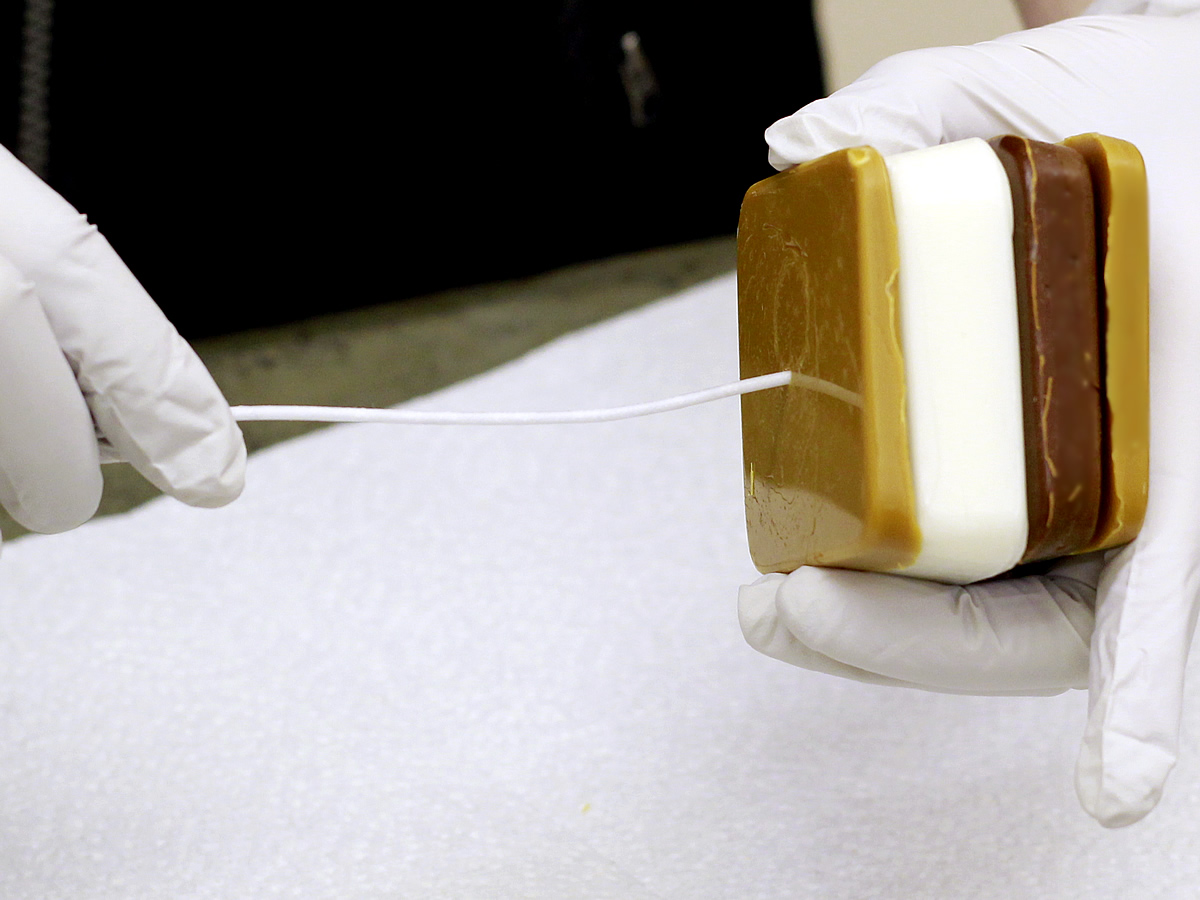
Step 7:
Put all the pieces together, taking care to align the wick holes. Thread the wick through all of the holes.
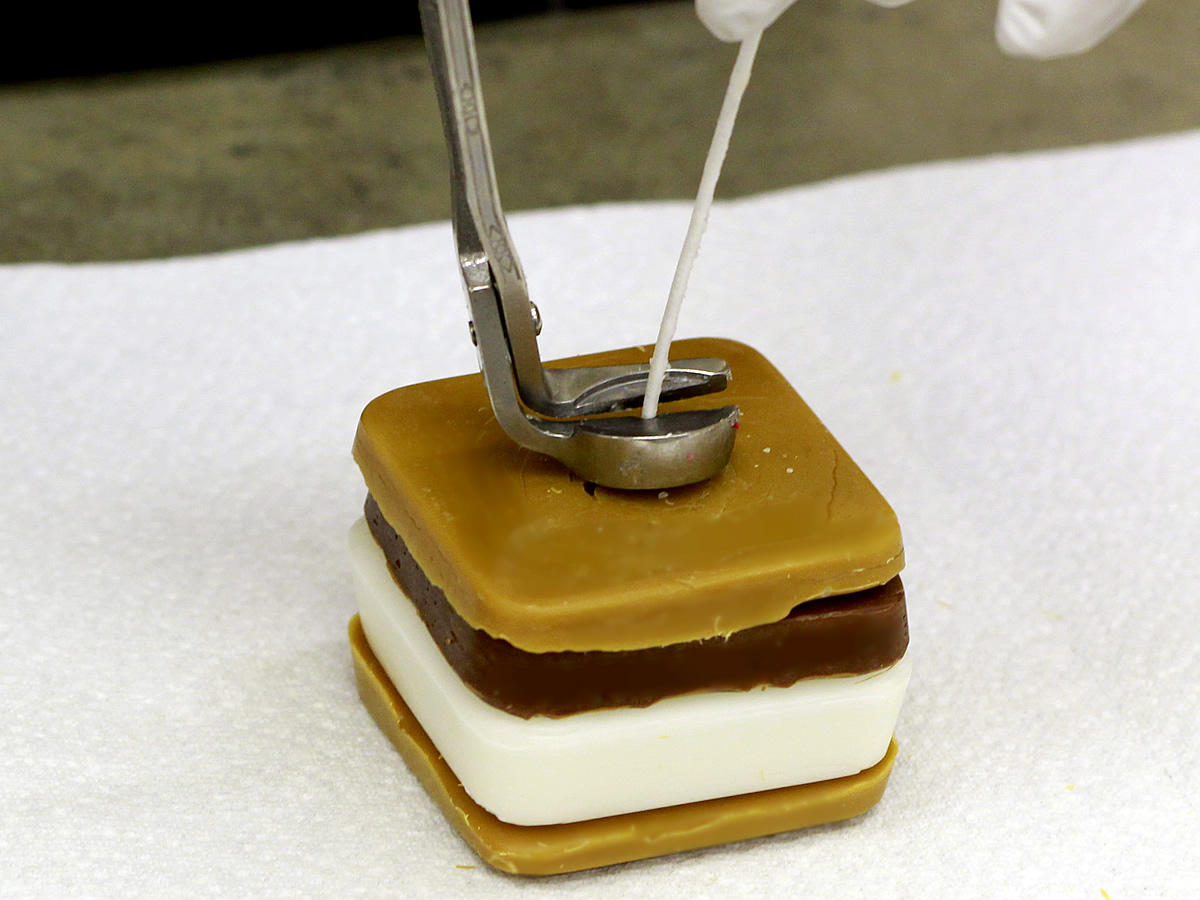
Step 8:
Trim the wick to about ¼” and enjoy! Remember to burn on a designated candle holder, and never leave a burning candle unattended!


Leave a Reply