Instructions for setting up water baths for the purpose of cooling candles.
Water Baths
Contributed by Alan Wallace
 Basically, a water bath entails placing a weighted mold, filled with molten wax, into a bath of cool water. Here we will discuss some of the benefits of water baths and how to use them.
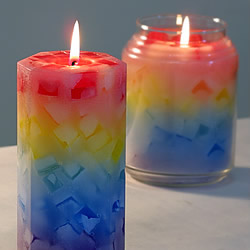
Water baths are sometimes referred to as cold water baths, but are seldom actually made with cold water. Water at room-temperature works just fine. When we use water baths, we are taking advantage of the high capacity of water to absorb the heat from our molded candles. It dramatically accelerates the cooling of our candles. This accelerated cooling also has the added benefit of providing a shinier and more lustrous surface finish for our candles. Many of the surface blemishes common with candles cooled at room temperature become a non-issue.
There are a few things we will need to set up a water bath.
-
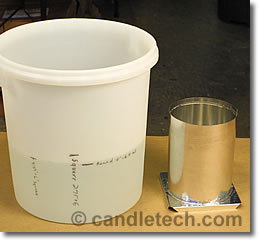
A vessel capable of holding water to a level at least as deep as our mold. Common five-gallon buckets work well for this sort of thing. Three-gallon buckets probably work better because they are not quite as deep.
-
A water pitcher. Used for transporting water from a nearby sink to wherever we happen to be making candles.
-
Mold Weights. Remember that wax is more buoyant than water and a wax-filled mold will tend to float when placed in water. Weights are necessary to keep your mold submerged and resting on the bottom. A chain wrapped around the base of your mold does a great job. If you are using seamless aluminum molds, you will want to find something that you can securely rest on top of the molds to keep them submerged. A number of different household items can act as weights.
Ideally, when our mold is filled with hot wax, we will want the water level to be about even with the wax level. But we don’t want any water to enter the mold. If the water level is too low relative to our wax level, there will be evidence of this on the finished candle. There will be a “frost” line at the level of the water. So, the challenge is to figure out how much water you need to have in your bucket to achieve the proper water level once the mold is submerged.
There are two ways to reach the right water level. I will go through them both.
In the first approach, we place an empty, sealed, and weighted mold into the bucket and proceed to fill the bucket with water to a level about a half inch less than the top of the mold. We then remove the mold from the bucket. The resulting water level tells us how much water we will need in the bucket each time we use that particular mold. Being the fairly intelligent creatures that we are, we break out the permanent marker and draw ourselves a line so we will always know exactly where this water level is. Realizing that we might have more than just one mold, we also write notes on the side of the bucket to give us clues as to what mold any particular line corresponds to.
So, now our bucket is set up with some water in it that we believe is at just the right level. We wick and fill our mold as usual. Then, we transport and set the filled mold into the water bath, being careful not to get any water in our mold. (The mold will be hot so protect your hands!) Notice that we did not fill the mold while it was in the water bath; we filled it before placing it into the water bath. Filling a mold that is already in the water bath will yield some interesting surface blemishes. At this point, a basic pillar proceeds pretty much as usual, although the pace of things is increased as a result of the accelerated cooling.
Be sure to use caution when moving any mold containing hot wax!
As mentioned earlier, there is a second approach to water baths. The prepared mold (wicked, sealed, and weighted) is placed into the empty vessel (bucket, stock pot, whatever). We then fill our mold with molten wax as usual. Then, we pour water into the vessel up to the desired level. Care should be taken not to splash water into the mold. You may even want to cover your mold temporarily with a piece of foil just in case. Also, if you choose to do it this way, once you begin filling with water, you can’t really make any extended pauses, otherwise you will have lines in your finished candle that reveal the pauses. So, you have to work fairly quickly. Having two pitchers of water may prove handy.
The benefit of the second approach is that you are never transporting a mold full of hot wax, and it doesn’t require much planning.
One last thing; although it might be tempting, do not use a water bath for container candles. Water baths are meant for molded candles (i.e. pillars). Glass and ceramics are almost certain to break from the thermal stress under such conditions.


what you can use to carry hot mold to the water bath
Hi Eleanor. I would use metal coat hangers to make a frame that grabs the base of the mold. Someone else asked the same question recently, so I will try to assemble a short tutorial that includes photos or a video.
I do make pillar candles I find white spots and lines in my candles after sometime I immerse my mold into water. Willbu pls suggest me some better ideas so that I don’t get white spots on my candle surface
Love the idea of using the water bath to creat different textures on the surface of the wax making the candle more interesting.
Thank you and certainly enjoy reading your suggestions.
:-D))))))))
Grace
I have used old metal hangers that I have straightened spot soldered to my mold and then bent to create convenient handles. This way I can use the handles to transfer to bucket with water already in it. I find this eliminates most of not all surface blemishes. I actually like adding 4-5 I’ve cubes immediately after seeing the mold in the water bath. It seems to provide a high gloss surface that sets rapidly with minimal blemishes.