Step by step instructions for converting a Presto Kitchen Kettle into an efficient, cost-effective wax melter with a handy spigot for easy dispensing.
| Making Budget-friendly Wax Melters from Presto Kitchen Kettles Contributed by Alan Wallace, Peak Candle Supplies |
|

Built in thermostat to regulate heat. Never set the thermostat beyond 250 F. |
Sooner or later you may find that a double boiler just can’t keep up with your demand for hot wax. While commercial wax melters certainly have their place in a production environment, prices for a commercial melter may set you back at least $600. For many candle-makers that kind of investment simply isn’t practical while they are trying to grow their business. Enter the Presto Kitchen Kettle, often simply referred to as a Presto Pot. A Presto Pot has a few features that make it attractive to candle-makers that are looking to expand their wax melting capacity beyond the traditional double boiler. First of all, it has a built-in heating element that is able to melt seven or eight pounds of wax in about 20 minutes. It has an adjustable thermostat to regulate the temperature and get you in the ballpark of your proper temperatures (you still need to monitor your temperatures with a real thermometer). It has a non-stick surface that is easy to wipe clean with a paper towel while it is still warm. And the most attractive thing about them is that they are cheap, and as your needs grow you can scale up the number of Presto Pots that you use. You can find them at your local discount stores like Wal-mart or Target for about $20-30. Many second-hand stores will also have used ones for a few dollars. Just be sure that it has the adjustable thermostat. Non-adjustable deep fryers, like fry-daddy’s, are not to be used for melting wax as they have a fixed heat setting that is dangerously high for wax. Don’t even think about it. Never let your wax exceed 250 degrees F and never set your thermostat beyond that. It will not speed up the melting process. In this article, we are going to attach a spigot to make a used Presto Pot handier for our purposes. With a spigot attached, we can easily dispense molten wax directly into our pouring pitcher. Some candle-makers will prefer to mix dye, fragrance oil, etc. directly in the Presto Pot. Others will prefer to do the mixing only after the melted wax is in the pouring pitcher, in essence leaving only clean wax in the melter. It is really up to you and probably depends on the size of the batches you typically do. Here we go.
|
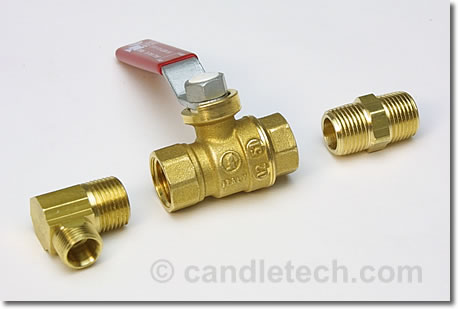 In addition to a Presto Pot, you will need:
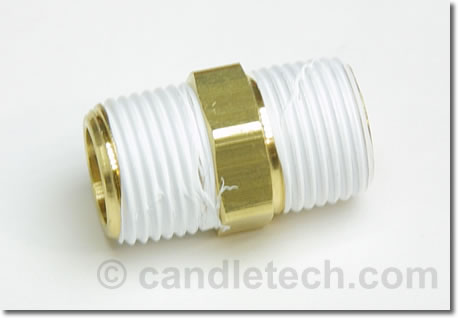
The following brass parts and tools:
- 3/8″ Hex Nipple
- 3/8″ Full-Port Ball Valve, ball valves are preferred over any other kind of valve because of the heat tolerance and because of the short motion required to open and close them.
- 3/8″ Elbow
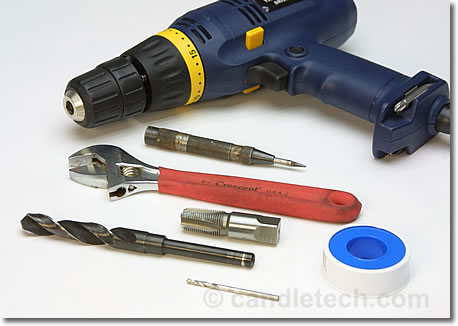
- Power Drill
- Crescent Wrench
- 19/32″ Drill Bit
- small drill bit
- center punch
- Thread tap to match the size and threads of the brass fittings
- teflon tape
Instructions:
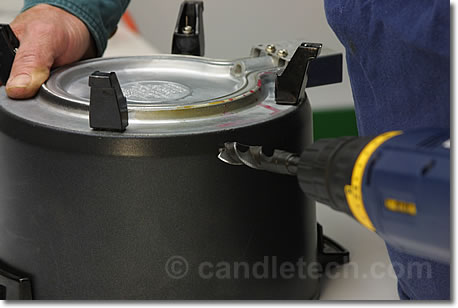
 Step 1: Create a Pilot Hole
Begin by using the center punch to mark the location for your pilot hole. Because of the non-stick surface of the Presto Pot, this step is important to guide your drill bit. Position it as close to the bottom as possible, but keep in mind that the resulting hole will need to be slightly above the heating element (don’t want to end up drilling into the heating element)
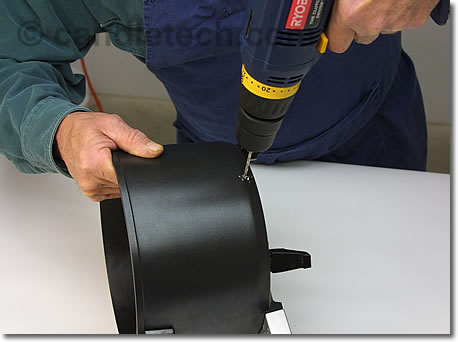 Make sure you are wearing proper eye protection.
Using a small drill bit, create a pilot hole to guide the larger drill bit.
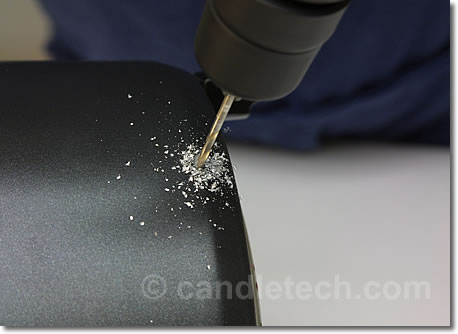
The size of the smaller bit is unimportant, the point is to create a pilot hole to guide the larger bit. without a pilot, things can get sloppy.
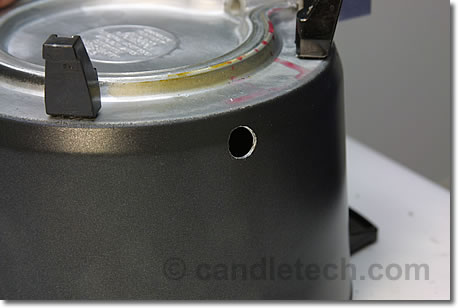
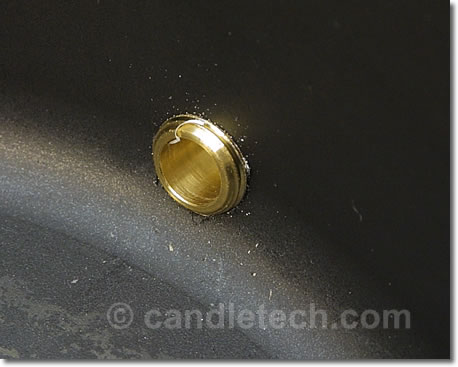
 Step 2: Drill Large Hole
Place the presto pot upside down on a firm surface. Then, using a 19/32″ drill bit, bore the hole out for the larger diameter.
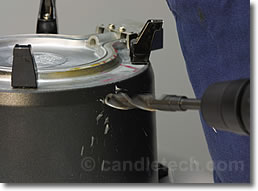
Again, you should already be wearing eye protection.
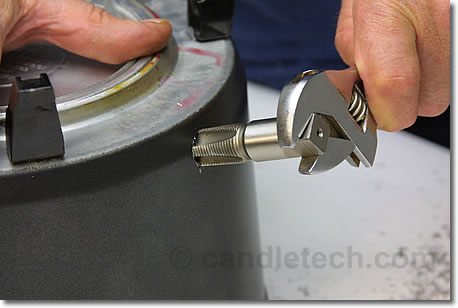 Step 3: Tap Hole
Using a thread tap that is suited for the size of the brass fitting, tap threads into the pot.
You will want to back out the tap every few turns and check to see if the brass fittings can be inserted. Once they can be screwed in with some slight resistance, stop tapping
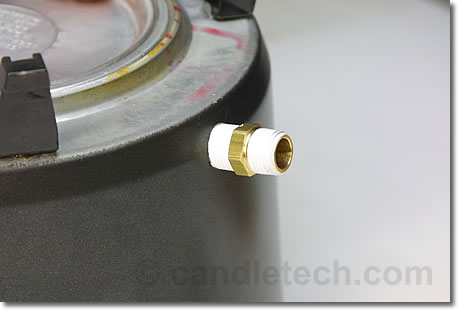
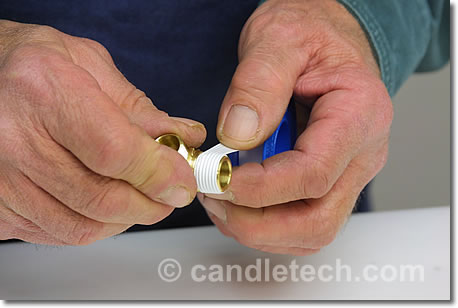 Step 4: Prepare fittings with teflon tape.
Using some teflon tape, prepare the fittings as shown. Wrap the tape in a clock-wise fashion around the threads.
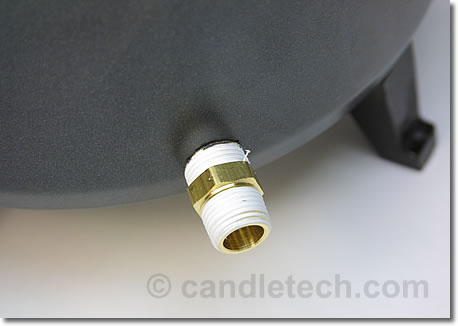
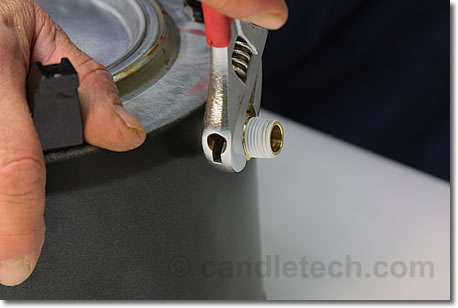 Step 5: Install nipple
With the nipple fitting wrapped in teflon tape, screw it into the pot. The wrench comes in handy here
Do not tighten it all the way to the hex. It is not necessary.
At this point, the nipple protrudes only slightly into the pot. But it is securely in place due to the presence of the threads.
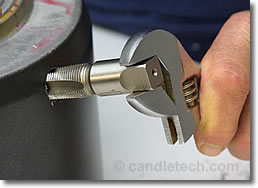
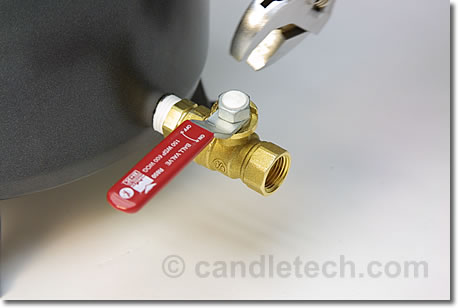
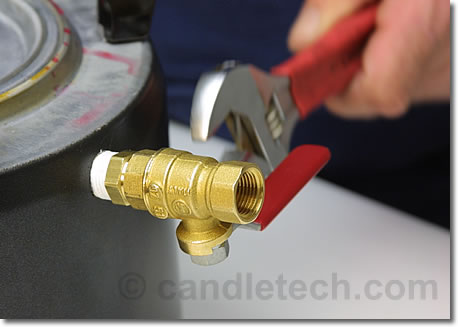 Step 6: Install Ball Valve
Using a wrench install the ball valve. Pay attention to the orientation of the ball valve. The ball valve is installed in such an orientation that the valve will open as the handle is pulled AWAY from the pot.
Tighten securely. Some rotation of the nipple will occure here and that is a good thing. Tighten until the entire assembly feels relatively tight and secure. Remember though that the pot is constructed of aluminum so you will not want to use excessive force. It is easy to strip the threads in the aluminum pot.
 Then flip over the pot and give it any fine adjustments to make the ball valve handle level with your work surface.
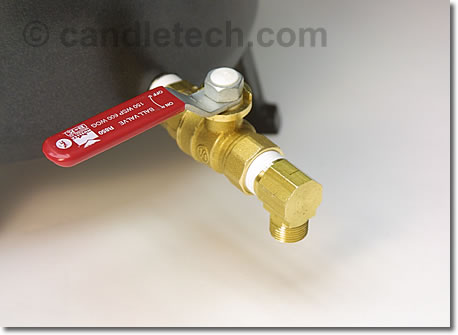
Add the lass fitting, the elbow. No tools are needed for this as it only needs to be hand tightened. Keep the valve handle stable as you install the elbow.
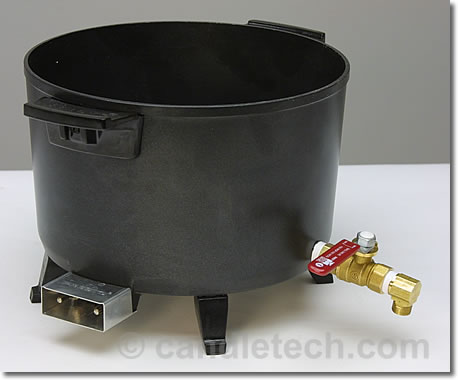
Step 7: Test for Leaks
Here is the almost finished melting pot.
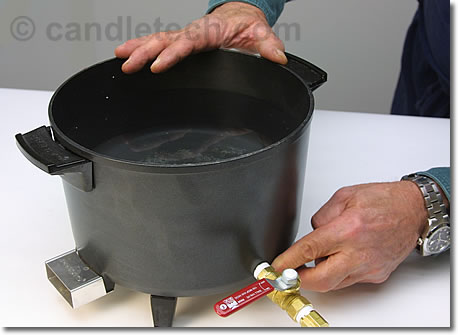
The last thing to do is test for leaks. This is done by filling the pot with water. Allow it to sit for several hours. Check the fittings for any wetness that would be indicative of a leak.
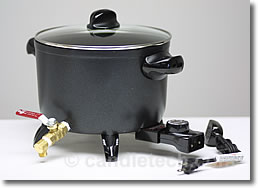 The finished product


This sounds amazing. Anyone out there who has fabricated one of these and put it through its paces have any reviews to share? This sounds almost too good/easy to be true. But thank you for posting this. Even if it doesn’t quite do the trick, I’m only going to be out a few bucks, and compared to my current methods, this looks way safer.
I should have written a reply to this a while ago. Yes, I followed these instructions exactly and my finished product is great. Love it! Thank you again Candletech for posting the pics and directions.
In the final photo, the photo of the finished product, the valve seems pretty clearly tilted at a downward angle. Is that intentional; i.e., can you comment on that?
Sure! I can comment on that. I remember the day of that photo, about 20 years ago. That was my father in law demonstrating the process, while I shot photos with a 35mm camera. He passed away in 2017. He was a stand-up human being.
As far as the angle of the valve stem in the photo, that was a consequence of the shape of the presto pots back then. The real objective is to square up that valve stem with the surface of the presto pot, i.e. perpendicular to the plane of the surface at the mounting location.
I hope that helps.
Hello sir, this certainly did help; I understand 100%. I just finished making mine and my spigot is downward tilted exactly like yours. I really appreciate your photos and instructions overall and also your comments in responding to my question. God Bless to you and your father-in-law; the world needs more people like that.
Thanks also for the follow up comment re: the negative angle and draining correctly for less hassles when the wax solidifies. I’m not much on posting things online, but I am glad I did here.
If the angle is positive, it’ll clog your spout when it solidifies. Just, a mess. Negative angle to properly drain.
Sure, but now we are leaving about an inch of wax in there, right?
Yes, there will be some residue in there if you don’t dump it out. C’mon, you can do some work. Personally, I would just use the melter for the heavy lifting of handling clean wax, i.e. to melt it. Once it is melted, use other containers to handle/mix the wax. Cheers, Alan
Would plumbers putty be ok to use if there’s a small leak on the end threaded into the pot? Just wondering about its heat tolerance.
Absolutely. Plumbers putty should be in every candle makers toolbox.