Step by step instructions for embedding photos or illustrations inside of candles.
 Embedding photos in candles isn’t as challenging as it might seem. If you’d like to share keepsake photos in a unique and charming way, this is a great way to do it. The largest obstacle in embedding photos in candles is probably getting the photos close enough to the surface so that you may clearly see what is depicted. In pursuit of getting photos to appear as clearly as possible, many people have resolved to use decoupage or water-slide decals to affix images on the exterior of candle. In contrast, these instructions will demonstrate a very simple technique to secure an embedded photo directly against the exterior surface of your candle so that it is clearly visible, but is still fully integrated into the wax. For those that might be interested in offering this service as part of their candle making business, the results are reproducible and predictable enough that you could crank these out in volume if desired.
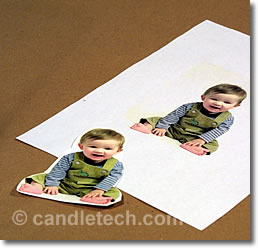
 We’ll start by looking at what to actually embed. Don’t embed the actual photograph. Instead, get the photo into a digital format (ex. scan it) and print it out. My suggestion is to use just plain copy/printer paper; nothing fancy. Heavier papers will obstruct the passage of light. Once you’ve got your printed copy, crop it so that it will fit into the mold you’re planning on using. Also, consider the possibility of doing a cutout in a fashion where you’ll end up with a silhouette. Sometimes it’s nice that way, sometimes it isn’t.
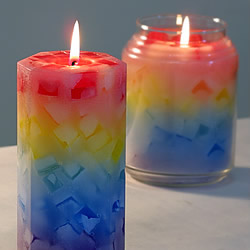
In these instructions, we’ll be embedding the photo in a hurricane shell. However, the same principles could be applied to embedding photos in regular pillar candles. When embedding photos in pillar candles, care must be taken in selecting a wick size that will not produce enough heat to create a fire hazard with the embedded photos. My suggestion is to use a wick of the smallest size possible. Also, use a high melting point wax to further suppress the flame. Then burn it only for a short time before filling the created cavity with a tea light for lasting enjoyment. And, as always, test your finished product for safety.
While we are using a photo here, any image that you can print on paper will work. This opens a slew of opportunities for embedding various artistic designs and illustrations.
In addition to the normal items required for standard pillar candles, you will need the following items- You Will need:
- High-melt straight paraffin with a melting point above 150F
- A mold with a diameter of 4″ or wider (wider is better). A 5″ round hurricane mold was used here. Seal the wick holes if it has any.
- Mold weights (chain used here)
- Water Bath
- Wet Washcloth
- An image printed on plain paper.
Instructions:
Step 1. Prepare water bath.
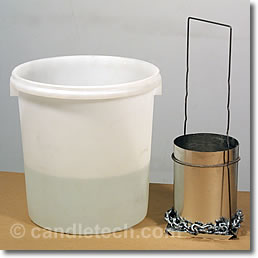
Begin by preparing your mold for a water bath. A water bath will be needed in this project (more water bath info here). In preparation for the water bath, attach weights to your mold. Also, prepare a water vessel with the appropriate amount of water.
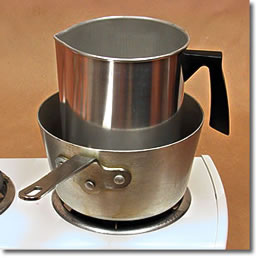
Step 2. Melt wax.
 Because this is a hurricane shell and we want it to withstand the heat without melting, we are using a high melting point wax. The melting point of the wax used here is about 163 degrees F (IGI-1260). My suggestion is to select a wax with a melting point above 150F; the higher, the better.
3 TBS of stearic acid per pound of wax was used to increase the opacity (whiteness) of the wax. Stearic is entirely optional when using high melting point waxes that already possess some opacity. No FO or dye was used.
 Melt your wax to 185-190 degrees F. Please review the wax melting instructions and pay attention to the safety advice.
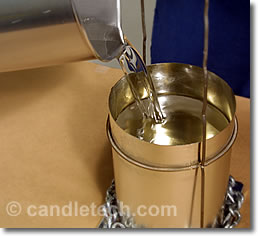
Step 3. Pour wax into mold.
If the mold you selected has a wick hole, plug it with some metal tape or mold sealer.
You may wish to lightly coat the interior of your mold with silicone spray or cooking spray to aid in removal of the finished shell. After spraying, wipe out any excess with a paper towel, leaving only a light film to coat the interior of the mold.
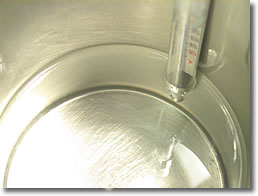
With the temperature of your wax at 185-190 degrees F, fill your mold.
I always fill my molds to a point that is no higher than about half an inch below the top of the mold. The half-inch clearance helps minimize the possibility of spills if you later have to move the mold, such as to a water bath.
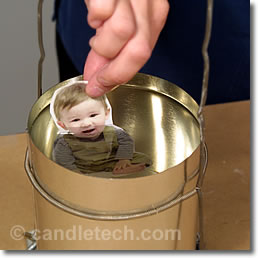 Step 4. Submerge photo into wax
Insert your photo into the wax-filled mold. Fully submerge your photo and allow it to sit for a moment or two. It will soak up wax and displace any air that is within the paper.
If there are bubbles still sticking to the photo, try to move the photo around a bit to dislodge as many of the bubbles as possible (chopsticks are handy). Having no bubbles is ideal, but not always practical, so don’t waste too much time on this step.
Also, lightly tap the sides of your mold with a blunt instrument to free up any bubbles that may be lurking there.
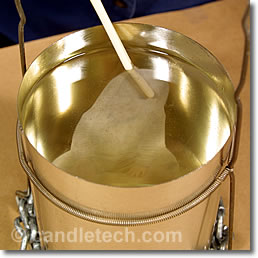
 Step 5. Position Photo using a spoon and wet cloth.
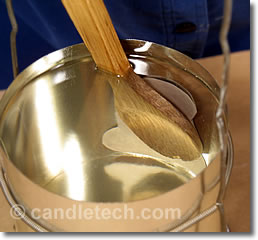
Using the utensil of your choice, position your photo against the sidewall of the mold. A wooden spoon was used here that was pre-heated in the hot wax. If the spoon were cold, the photo would have stuck to it on contact.
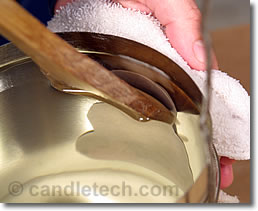 With the photo in place, take a wet washcloth, wet kitchen towel, or wet paper towels and apply it to the exterior of the mold at the location of the photo.

The wet cloth will absorb heat from the wax and it should solidify around the photo fairly quickly. You may have to rotate to use cooler parts of the cloth as needed. The frost that forms inside the mold around the photo is solidified wax that will secure the photo in place long enough for us to get the mold into the water bat
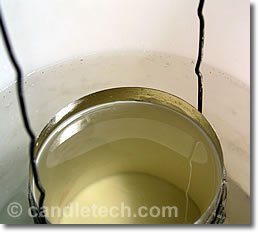 Step 6. Place mold in water bath.
Place the mold into the water bath. The entire interior will frost right away.
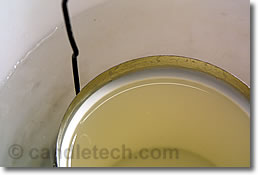
When your shell is as thick as you’d like it, remove the mold from the water bath. 3/8 to ½ of an inch is a good target thickness.
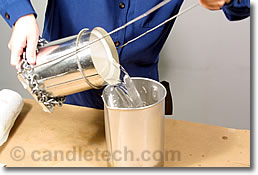
Step 7. Pour out inner wax.
With the mold removed from the water bath, wipe off any excess water from the exterior surface of your mold. If needed, slice open the top with a paring knife. Pour the core wax back into your pouring pitcher. Many times, the surface will not need to be sliced open, as no wax will have solidified on top.
Allow the shell to completely cool to room temperature before attempting to remove it from the mold. Trying to remove it too early will most likely leave you in frustration or mar the finish (both bad things). The cooling process can be accelerated by placing it in a refrigerator.
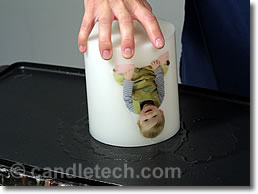 Step 8. Level the top
Once the shell is removed from the mold, place a cookie sheet on top of a pot of simmering water. The heated cookie sheet can then be used to melt away some of the wax on the top rim of the hurricane shell. Level the top to provide a clean appearance. If you have an electric griddle, you may wish to use that in a similar manner on low heat (as we did here).
You may also use a paring knife to help trim away any sharp edges.
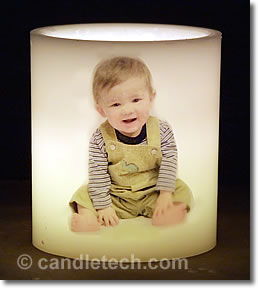 Step 9. Insert Votive
Insert a votive holder containing a votive candle inside your finished shell. Enjoy.
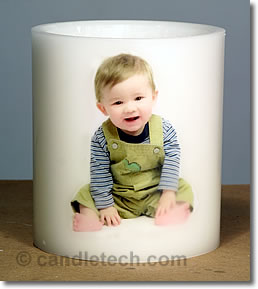
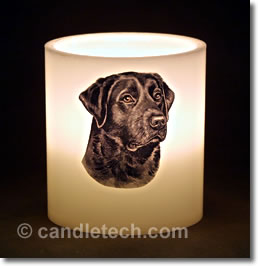
Photo/Image embed gallery.
Here is the finished candle from this project

I am interested in making and selling the embedded candle shells and selling them through my home. I am disabled and could really use an additional income. how much wax would I have to use for a 4×6 inch mold? and would that size mold be a good size to use.