
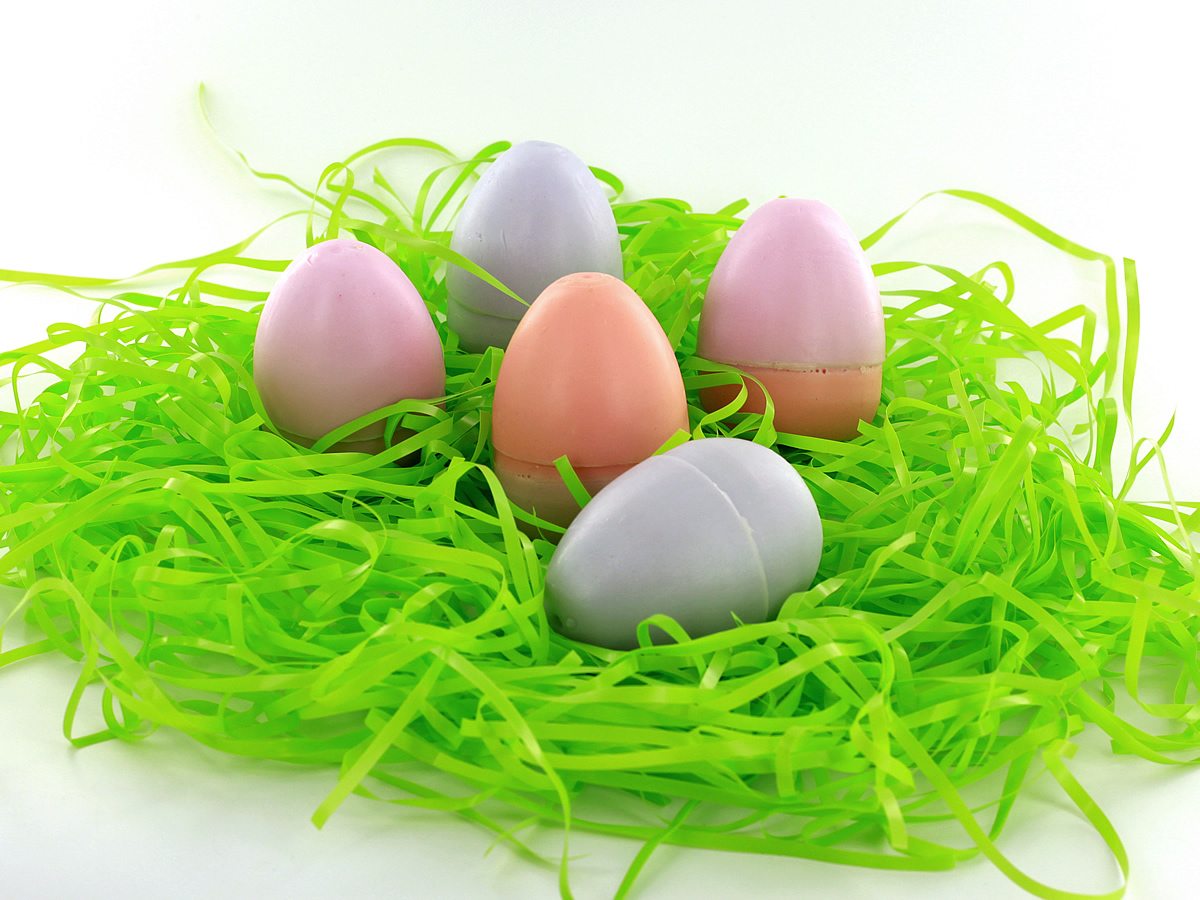
Make these adorable egg shaped soaps for Spring!
You Will Need:
–Melt & Pour Soap Base
-Plastic Easter Eggs
-Drill, pliers or scissors
–Mold Sealer or duct tape
-Small cups (such as shot glasses) or Votive Holders
-Microwaveable Pouring Container
–Bath & Body Colorant
–Bath & Body Safe Fragrance Oil (Optional)
–Scale (Recommended)
Step 1:
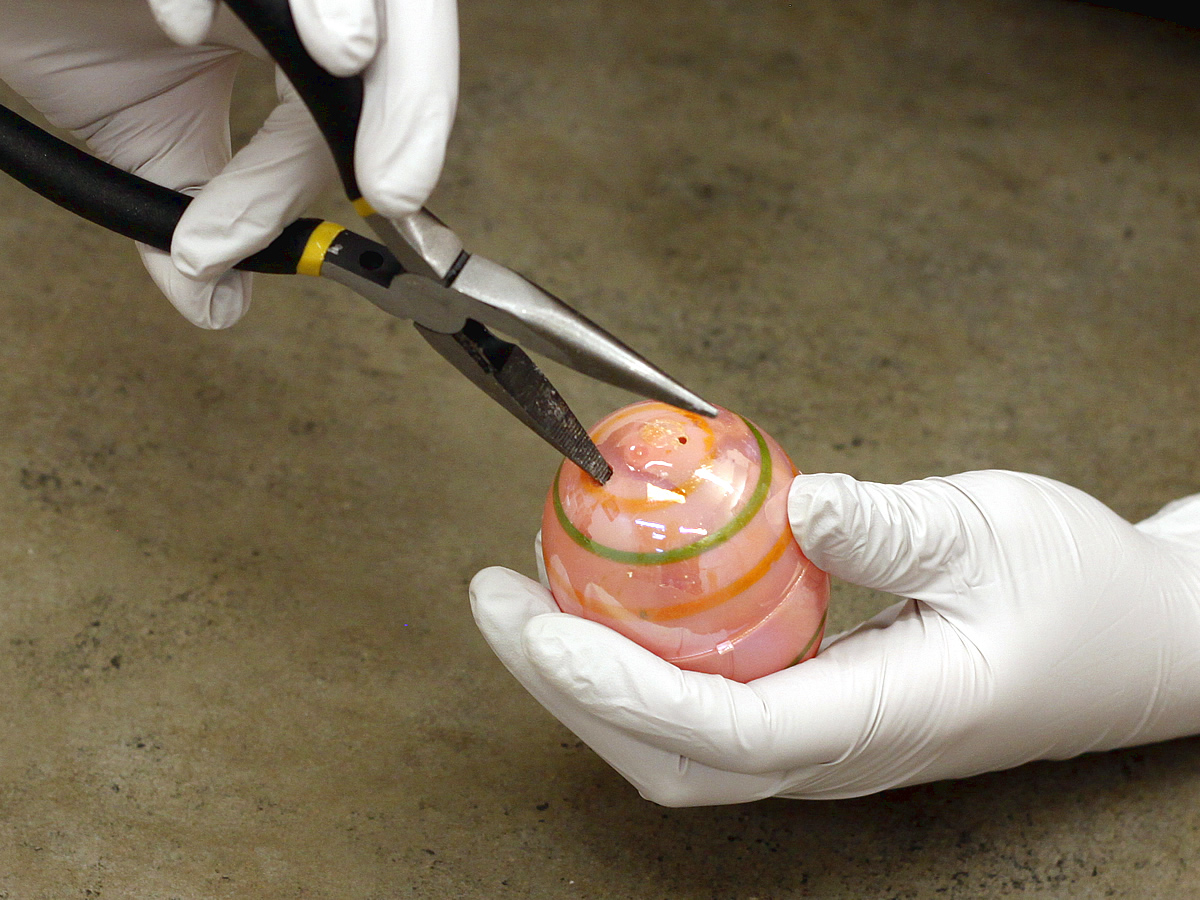
For your plastic Easter eggs, try to find the kind that come apart in the middle, and ideally have one or more holes on the ends. If they do not have holes, use a drill to make a hole in the bottom (fatter end) of the egg. If they already have holes, use some pliers, scissors, or other preferred tool to widen one of the holes until it is large enough to pour the soap in.
Step 2:
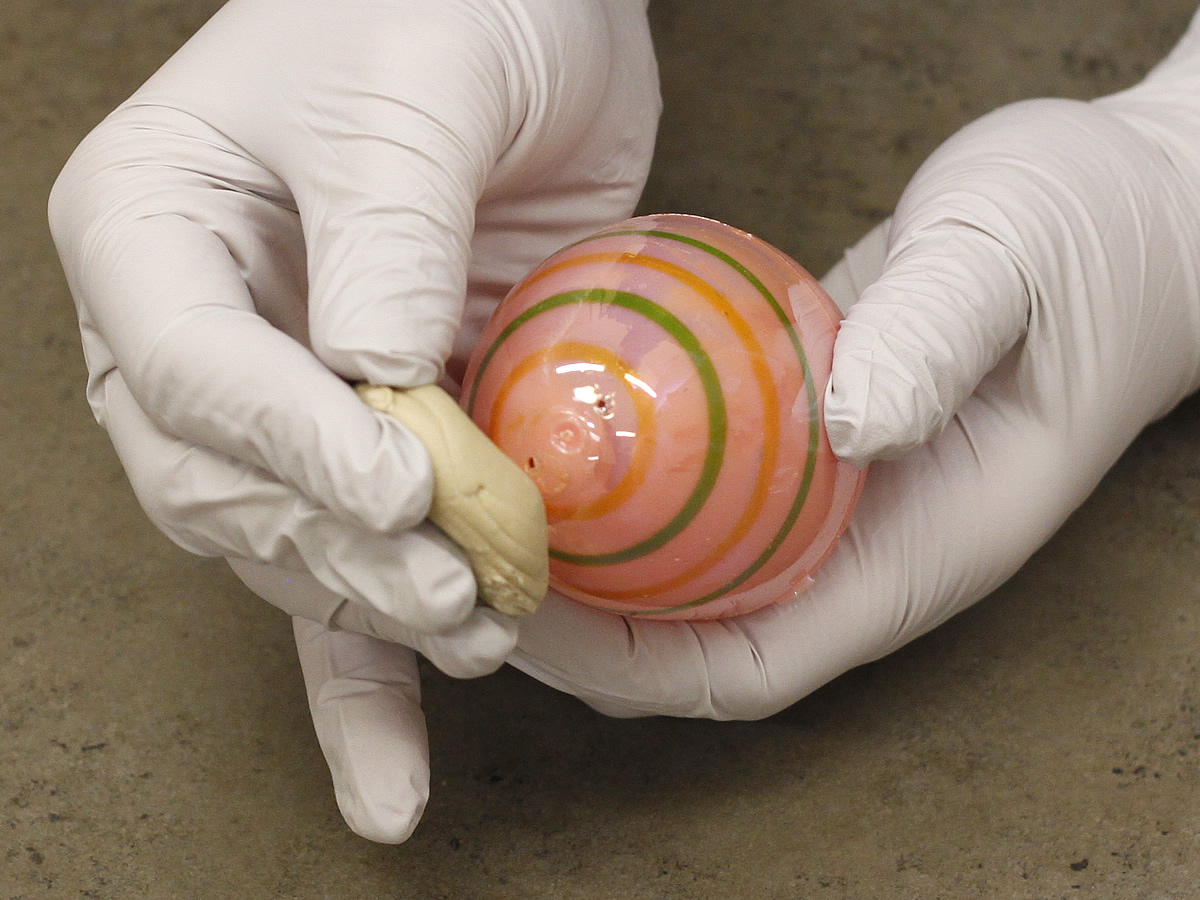
Use mold sealer or duct tape to seal any holes on the other end of the egg molds.
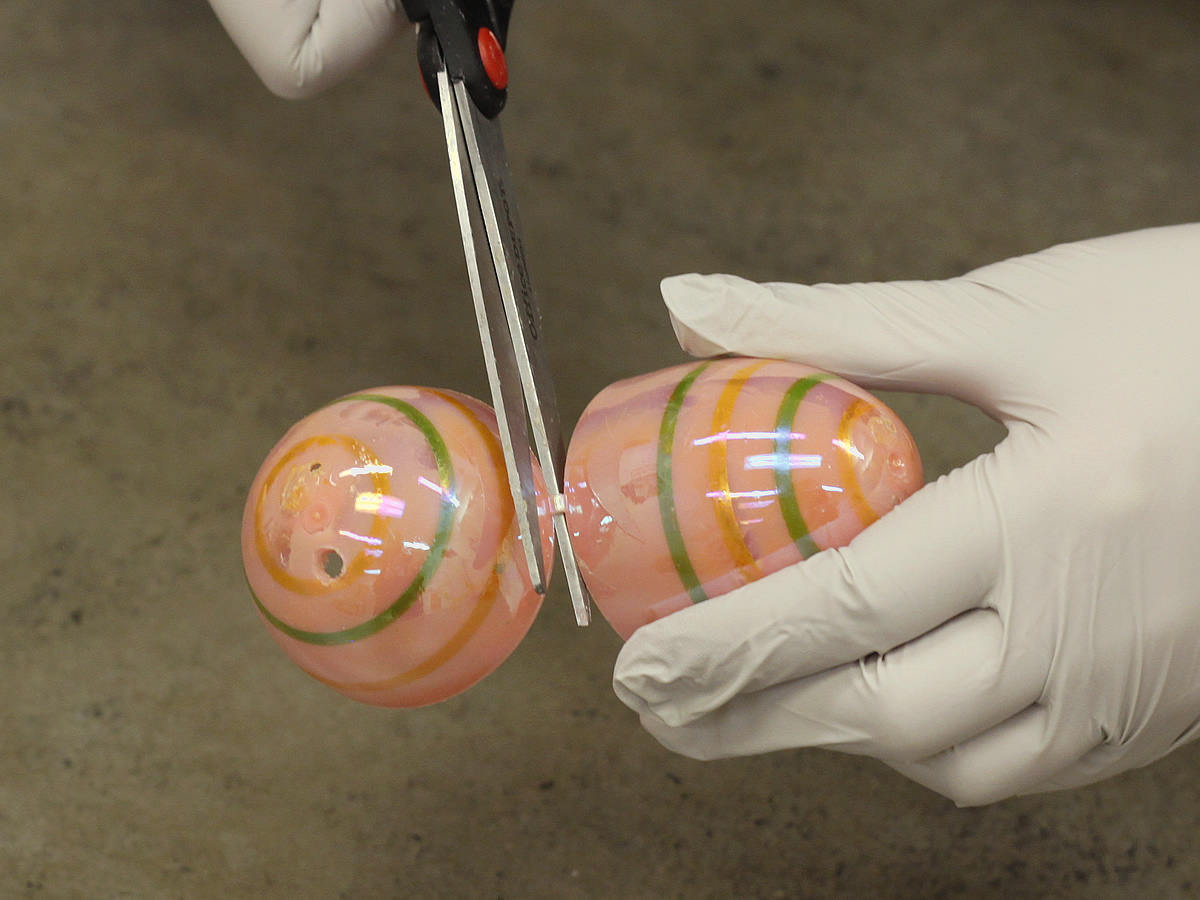
If there is a piece of plastic connecting the two parts of the egg, you may want to cut this apart so it is easier to remove the soap from the egg.
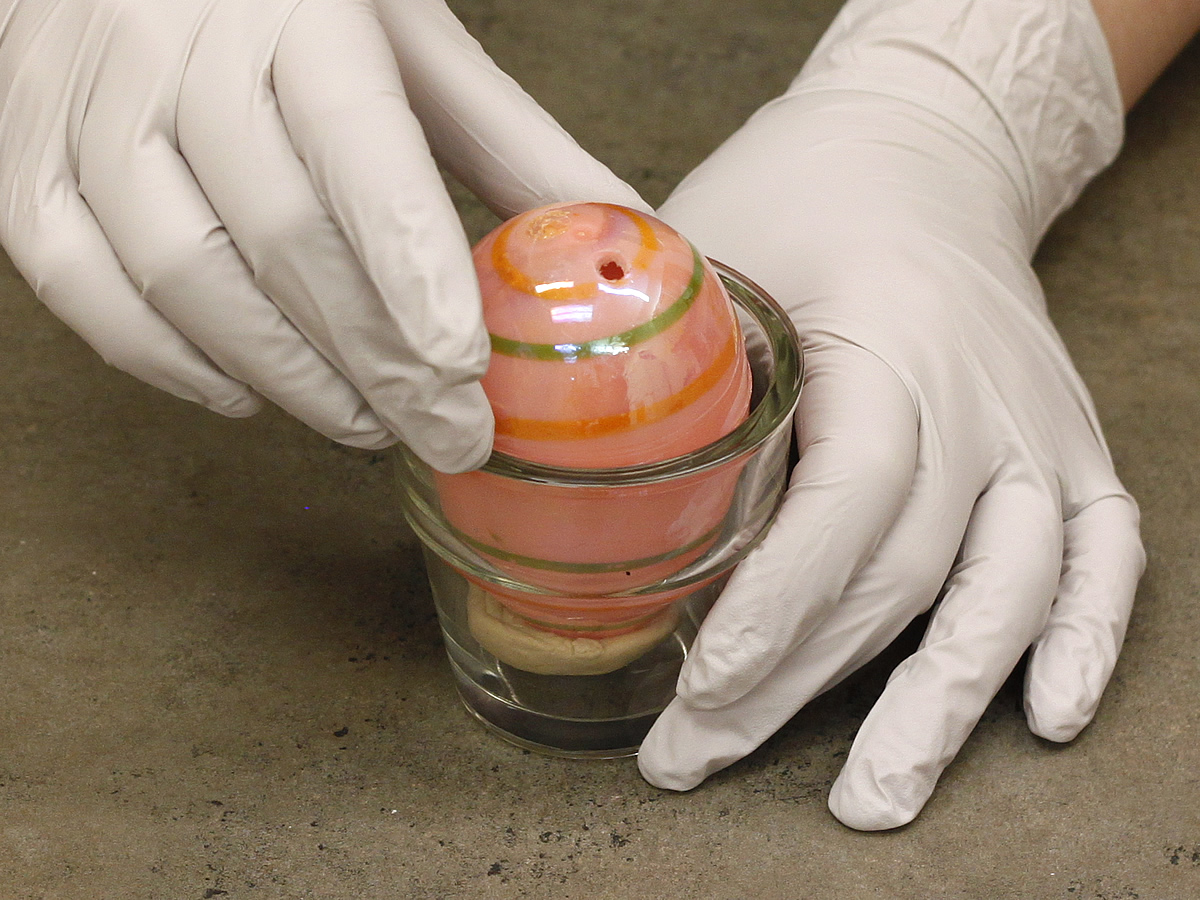
Place the egg into the cup or votive holder to keep it upright, making sure the pour hole is facing up.
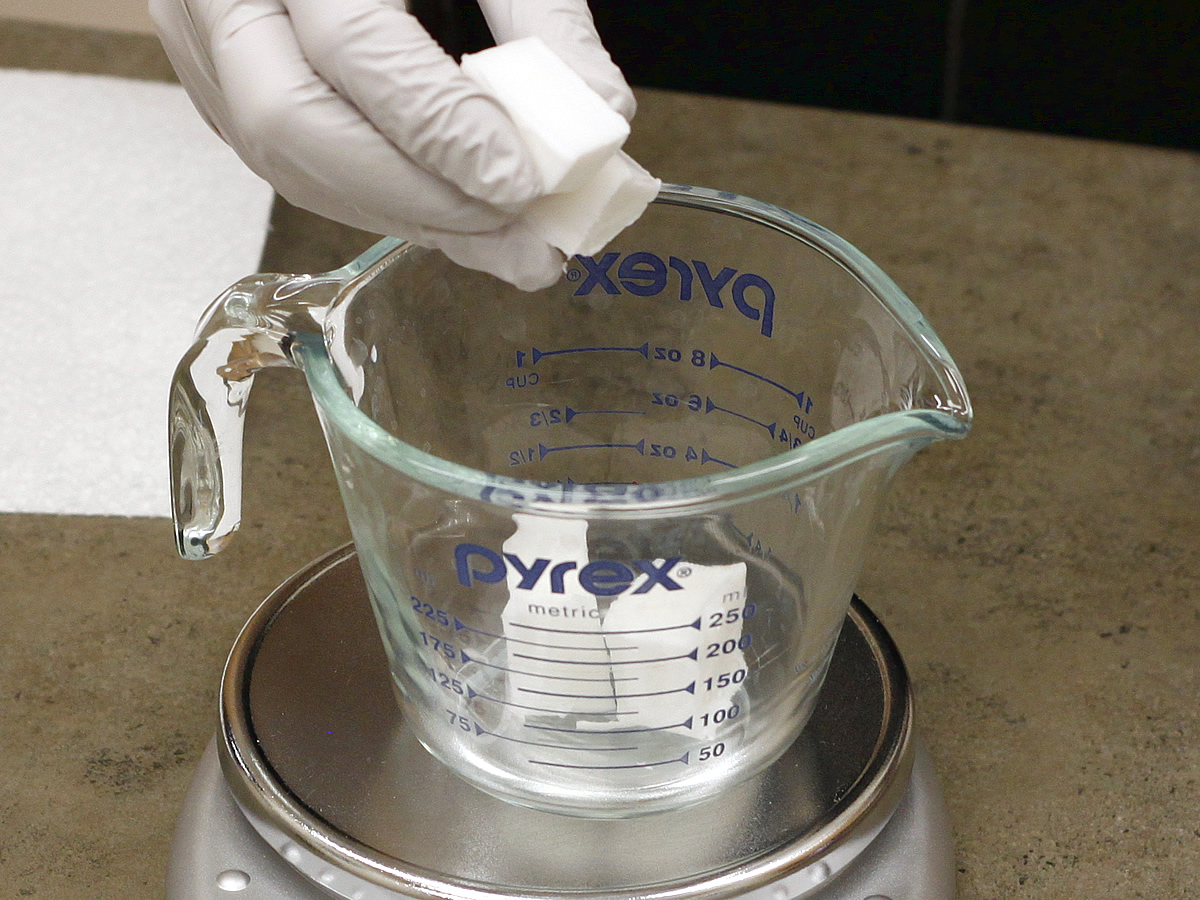
Step 3:
Cut your soap base into chunks and melt in the microwave in 30-second increments until fully melted.
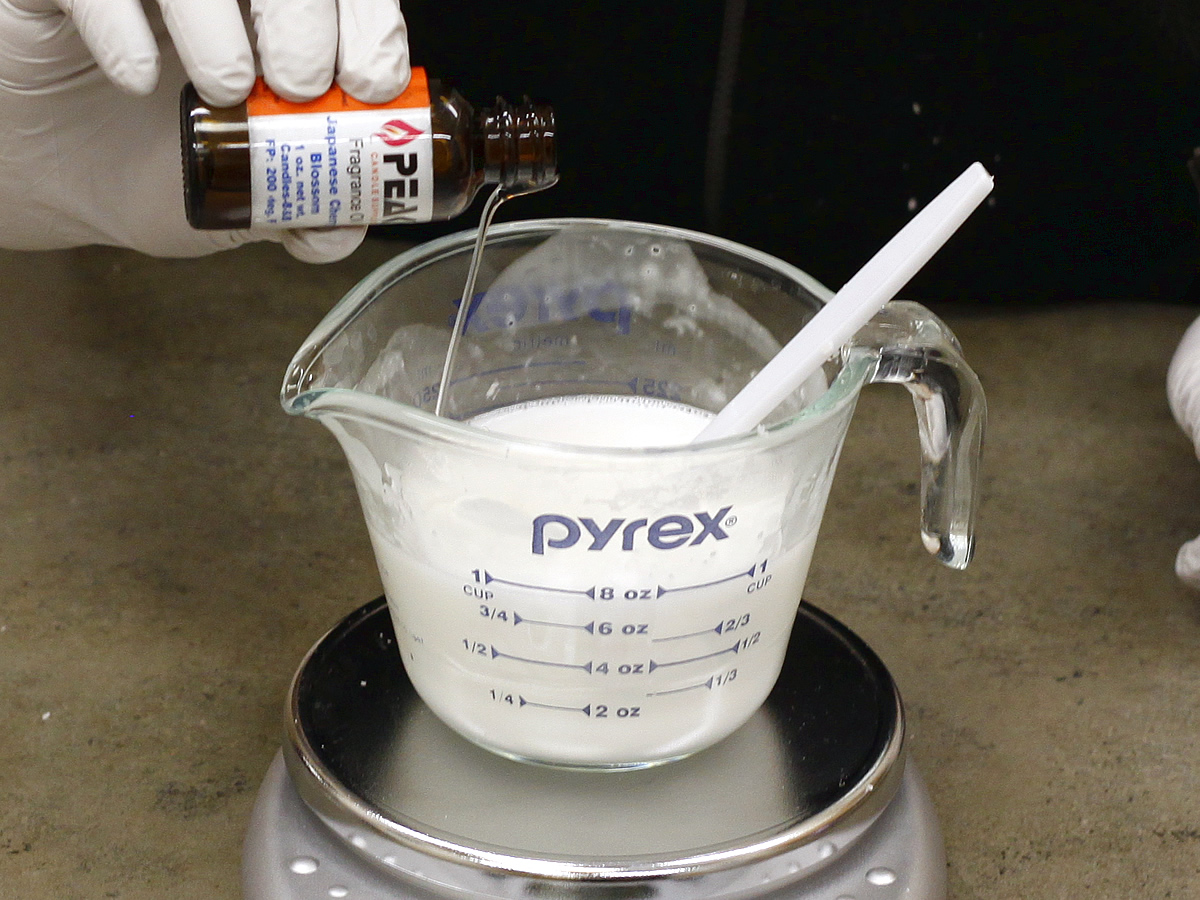
Step 4:
Add about 3-4% fragrance oil if desired and mix thoroughly.

Step 5:
Stir in your desired colorant until the soap reaches your desired shade. Tip: Our Pearl Micas are perfect for Springtime!
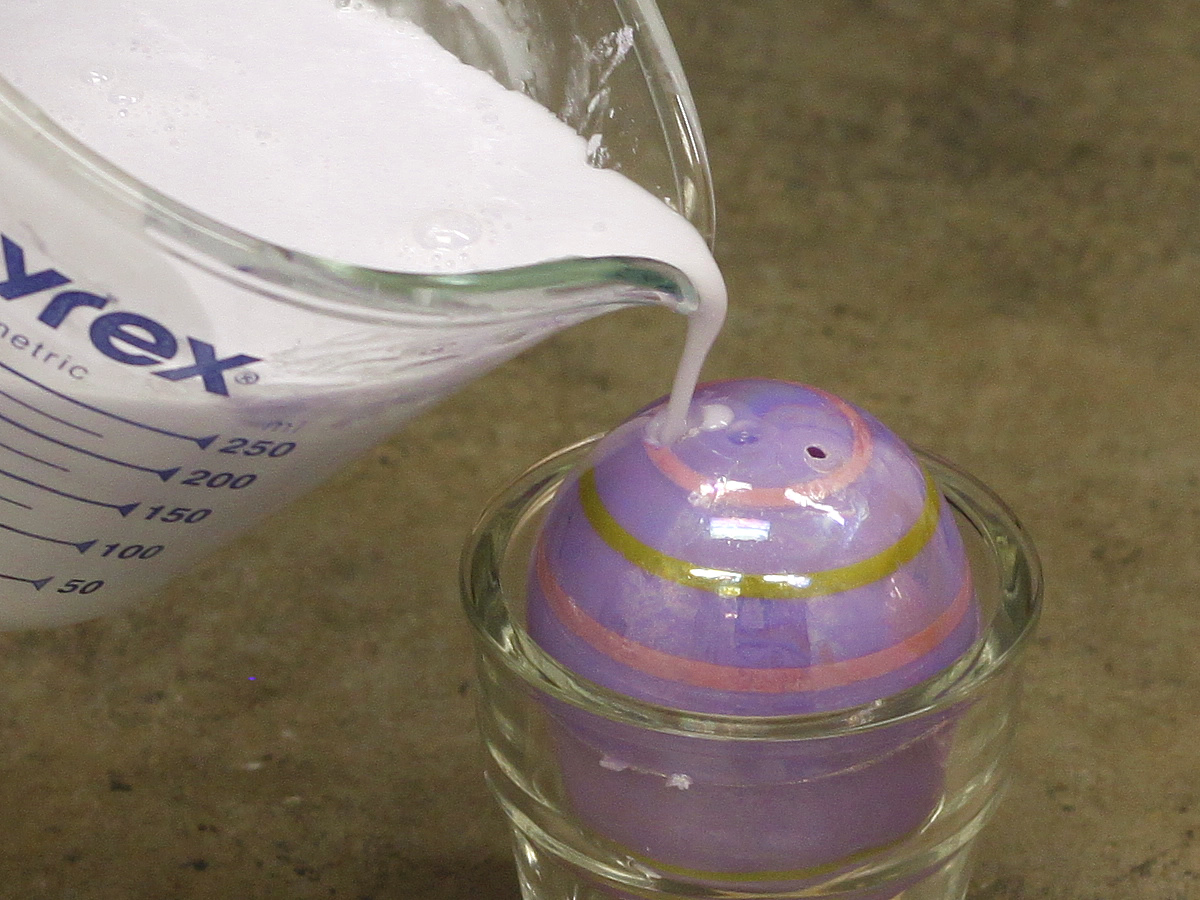
Step 6:
Pour the soap into the egg molds through the hole you created earlier and fill it up until the soap is almost to the hole (this will create a flat base for the soap to stand up). Don’t worry too much if some of the soap spills out. Tip: For a multicolored egg, fill the soap up to the seam line of the egg mold, allow to cool, and fill the rest of the way with a different color!

Step 7:
Once the soap has cooled completely, gently pull apart the egg mold to remove the soap inside. If it is difficult to remove, try placing it in the refrigerator for 10-15 minutes and try again.
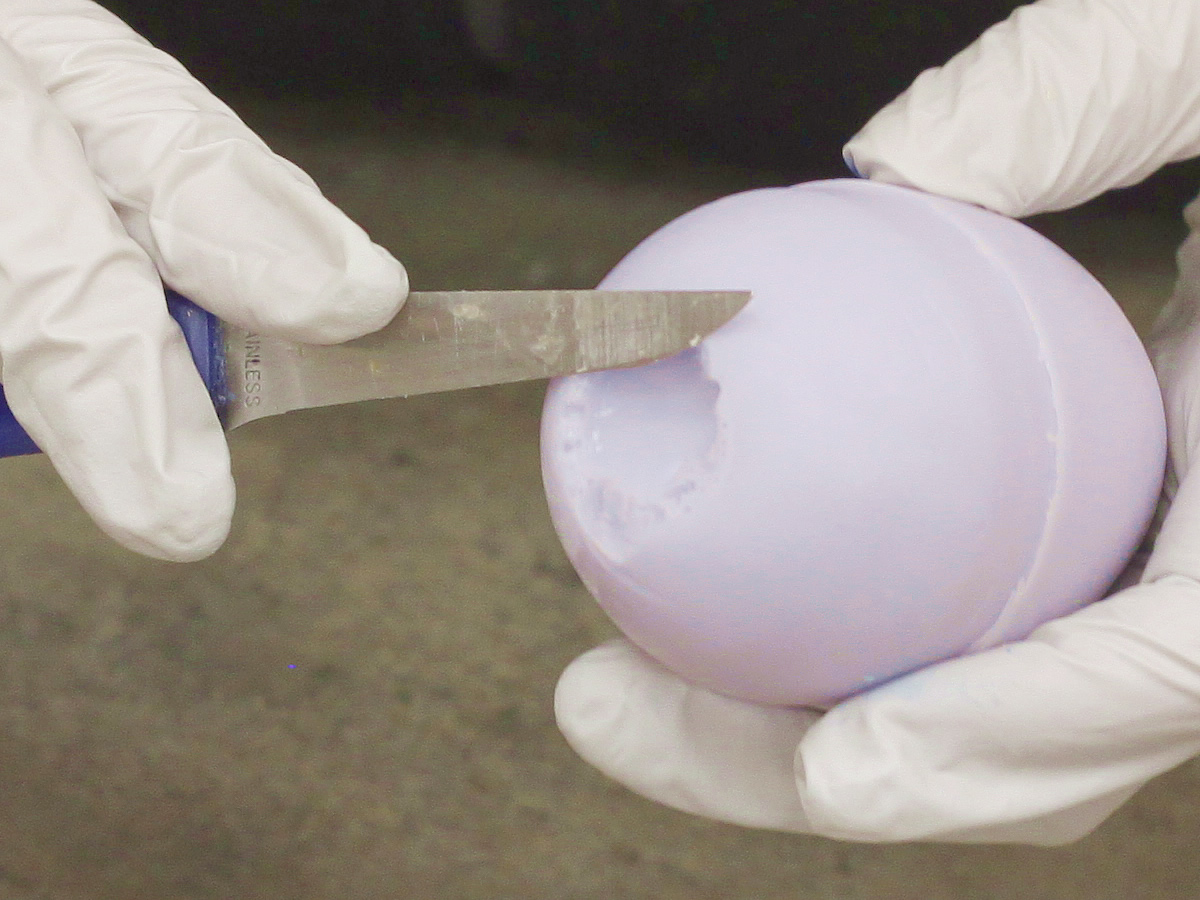
Step 8:
Shave off any bubbles or ridges from the flat end of the egg soap with a paring knife. Decorate with ribbon or simply set them next to the sink and enjoy!

Leave a Reply